If you've ever needed to move or duplicate data between sheets automatically, you're in the right place. In Google Apps Script, copying a row to another sheet is one of the most common automation tasks — and there are several ways to do it depending on your exact needs.
This guide covers 3 methods to copy a row to another sheet using Google Apps Script, with copy-paste ready code for each. Whether you want to copy based on a condition, copy on edit, or copy an entire row in bulk, there's a method here for you.
#Why Copy Rows Between Sheets with Apps Script?
Manual copy-pasting between sheets breaks the moment you add new data. Apps Script automates this permanently. Common use cases include moving completed tasks from an Active sheet to an Archive sheet, routing form responses to separate sheets by category, copying approved entries to a summary sheet, and syncing data from one tab to another based on a status column.
#Before You Start: Open the Script Editor
Open your Google Sheet, click Extensions → Apps Script, delete any placeholder code in the editor, paste whichever method you need below, then click Save and Run. You'll be prompted to authorize the script on first run — that's expected.
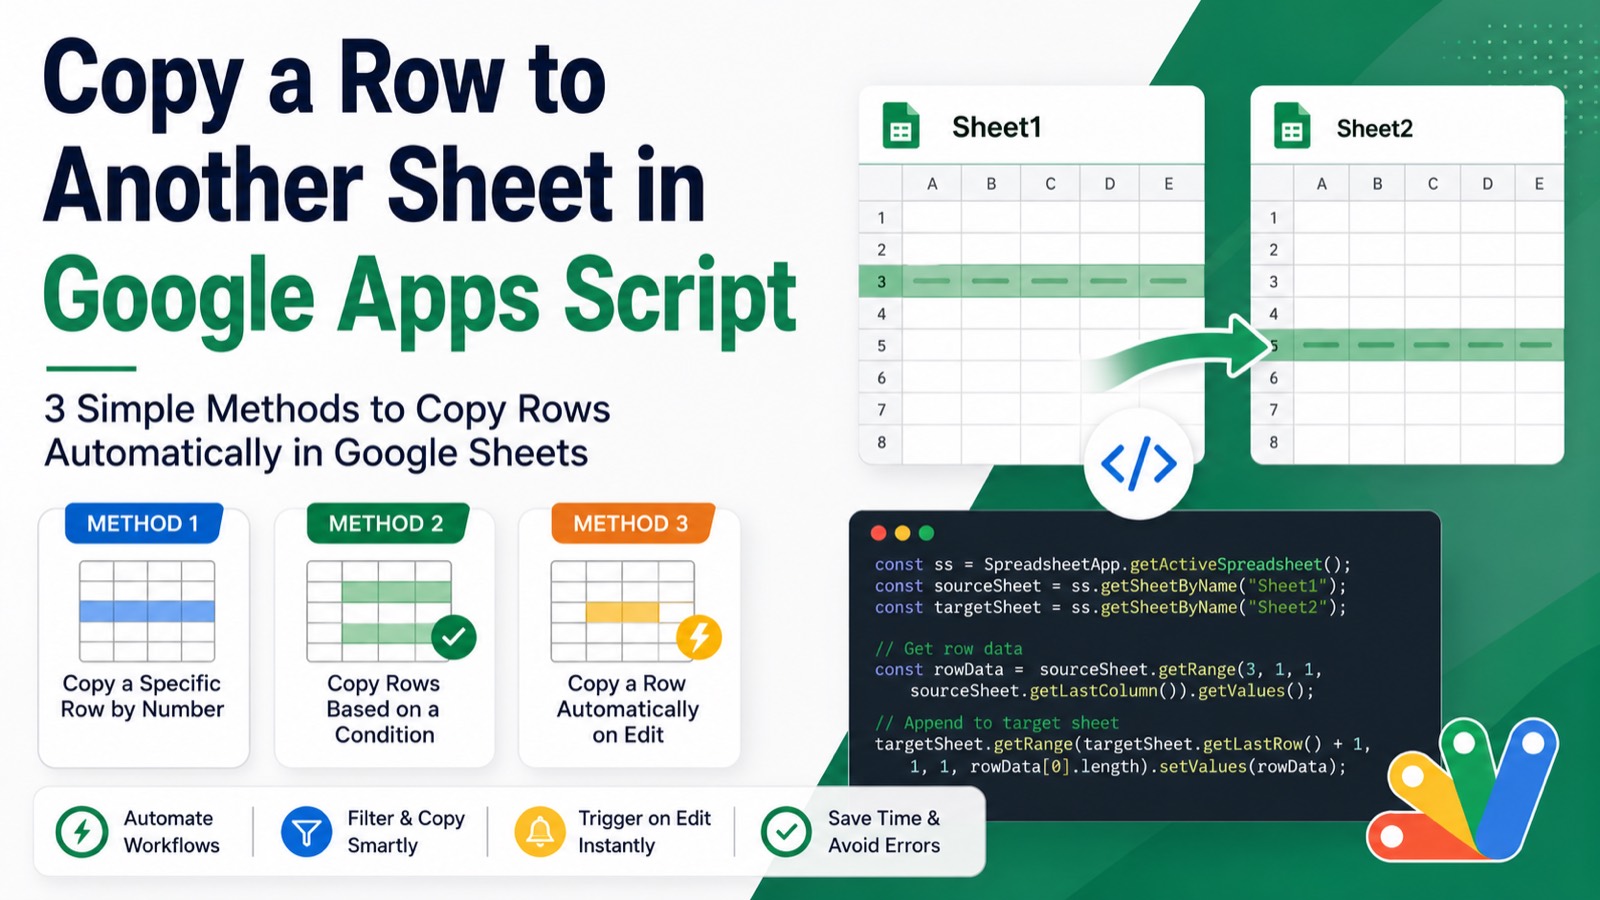
#Method 1: Copy a Specific Row by Row Number
This is the simplest approach. Use it when you know exactly which row you want to copy, or when you're building a more complex script and need a reliable copy function.
function copyRowToAnotherSheet() {
  const ss = SpreadsheetApp.getActiveSpreadsheet();
  const sourceSheet = ss.getSheetByName("Sheet1");
  const targetSheet = ss.getSheetByName("Sheet2");

  const rowNumber = 3; // Change this to the row you want to copy
  const lastCol = sourceSheet.getLastColumn();

  // Get all values in the row
  const rowData = sourceSheet.getRange(rowNumber, 1, 1, lastCol).getValues();

  // Append to the next available row in the target sheet
  targetSheet.getRange(targetSheet.getLastRow() + 1, 1, 1, lastCol).setValues(rowData);
}
This reads all values from row 3 of Sheet1 and appends them to the next empty row in Sheet2. Use it for quick one-off copies, or as a utility function inside a larger automation.
#Method 2: Copy Rows Based on a Condition (Most Useful)
This is the most practical method. It loops through all rows in your source sheet and copies any row that meets a condition — like a status column saying "Done" or "Approved".
function copyRowsBasedOnCondition() {
  const ss = SpreadsheetApp.getActiveSpreadsheet();
  const sourceSheet = ss.getSheetByName("Sheet1");
  const targetSheet = ss.getSheetByName("Archive");

  const conditionColumn = 4;  // Column D — change to your status column
  const conditionValue = "Done"; // Change to whatever triggers the copy

  const data = sourceSheet.getDataRange().getValues();
  const rowsToCopy = [];

  for (let i = 1; i < data.length; i++) { // Start at 1 to skip header row
    if (data[i][conditionColumn - 1] === conditionValue) {
      rowsToCopy.push(data[i]);
    }
  }

  if (rowsToCopy.length === 0) {
    Logger.log("No matching rows found.");
    return;
  }

  // Write all matching rows at once (much faster than row-by-row)
  const startRow = targetSheet.getLastRow() + 1;
  targetSheet.getRange(startRow, 1, rowsToCopy.length, rowsToCopy[0].length).setValues(rowsToCopy);

  Logger.log(`Copied ${rowsToCopy.length} row(s) to Archive.`);
}
> Writing all rows at once with a single setValues() call is far faster than looping and writing row-by-row. This matters a lot when dealing with hundreds of rows.
This reads all rows from Sheet1, finds every row where column D equals "Done", and copies all matching rows to the Archive sheet in one batch write. Use it for filtering completed tasks, archiving entries, and routing by status.
#Method 3: Copy a Row Automatically on Edit (Trigger-Based)
This method fires automatically every time someone edits the sheet. When the value in a specific column changes to your trigger value, the row gets copied to another sheet instantly — no manual running required.
function onEdit(e) {
  const triggerColumn = 5;       // Column E — the column to watch
  const triggerValue = "Approved"; // The value that triggers the copy
  const sourceSheetName = "Requests";
  const targetSheetName = "Approved";

  const sheet = e.source.getActiveSheet();

  // Only run on the correct sheet and column
  if (sheet.getName() !== sourceSheetName) return;
  if (e.range.getColumn() !== triggerColumn) return;
  if (e.value !== triggerValue) return;

  const row = e.range.getRow();
  const ss = e.source;
  const targetSheet = ss.getSheetByName(targetSheetName);
  const lastCol = sheet.getLastColumn();

  const rowData = sheet.getRange(row, 1, 1, lastCol).getValues();
  targetSheet.getRange(targetSheet.getLastRow() + 1, 1, 1, lastCol).setValues(rowData);

  Logger.log(`Row ${row} copied to ${targetSheetName}`);
}
This watches column E of the Requests sheet. When someone changes a cell in that column to "Approved", the entire row is instantly copied to the Approved sheet. It does nothing for edits in other columns or other sheets.
> The onEdit trigger runs automatically — you do not need to set up a separate trigger in Apps Script. It's a simple trigger that Google runs for you whenever a cell is edited.
Use this method for approval workflows, real-time data routing, and instant archiving.
#How to Copy a Row AND Delete It from the Source Sheet
Sometimes you want to move a row rather than copy it. Add a delete step after copying:
function moveRowToAnotherSheet() {
  const ss = SpreadsheetApp.getActiveSpreadsheet();
  const sourceSheet = ss.getSheetByName("Sheet1");
  const targetSheet = ss.getSheetByName("Sheet2");

  const rowNumber = 3; // Row to move
  const lastCol = sourceSheet.getLastColumn();

  // Copy the row
  const rowData = sourceSheet.getRange(rowNumber, 1, 1, lastCol).getValues();
  targetSheet.getRange(targetSheet.getLastRow() + 1, 1, 1, lastCol).setValues(rowData);

  // Delete from source
  sourceSheet.deleteRow(rowNumber);
}
Note: deleteRow() shifts all rows below it up by one. If you're deleting multiple rows in a loop, iterate from the bottom up to avoid skipping rows.
#Common Errors and Fixes
"Cannot find sheet 'Sheet2'" — The sheet name in your code doesn't match exactly. Sheet names are case-sensitive. Check for extra spaces too.
Copied row has the wrong number of columns — Make sure lastCol reflects your source sheet, not the target. Call getLastColumn() on the correct sheet object.
onEdit isn't firing — Make sure your function is named exactly onEdit — that's the reserved name Apps Script uses. Also confirm you're editing the correct sheet.
Script times out on large datasets — Use batch reads and writes (like Method 2 above) instead of reading/writing one cell at a time inside a loop. This alone can make scripts 10–100x faster.
#Which Method Should You Use?
Copy a known row manually → Method 1. Copy all rows matching a filter → Method 2. Copy automatically when a cell changes → Method 3. Move (copy + delete) a row → the move variant above.
#Take It Further
Once you can copy rows between sheets, the next step is usually adding conditions, sending notifications, or scheduling the automation to run on a timer. Combine Method 2 with a time-driven trigger so it runs every morning automatically, or after copying, email yourself or your team when rows move.
Or skip the scripting entirely — Google Apps Script Copilot writes all of this code for you in one prompt, directly in your browser. Free to try.