Google Apps Script is a free, browser-based coding tool from Google that lets you automate Google Sheets, Gmail, Drive, Calendar, and the rest of Workspace using JavaScript. There's nothing to install and nothing to pay for — if you have a Google account, you already have it.
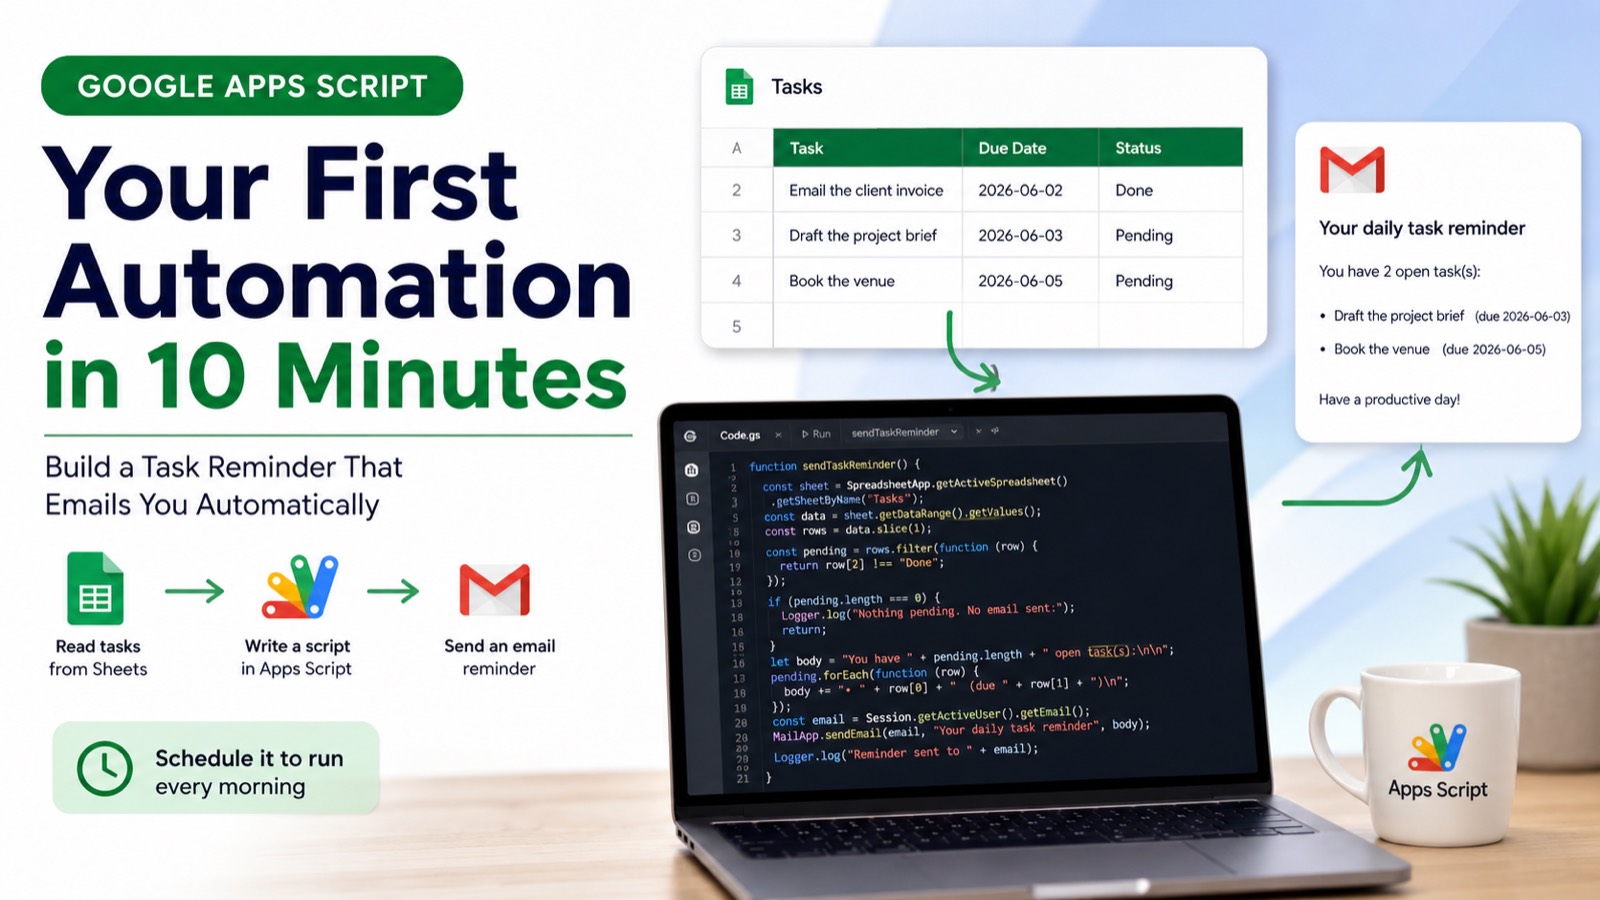
In this guide you'll write your first working automation in about 10 minutes: a script that reads tasks from a spreadsheet and emails you a reminder of everything that's still open. You don't need any prior coding experience. By the end you'll understand the three things every Apps Script project is made of — a script editor, functions you run, and triggers that run them for you.
#What Is Google Apps Script (in Plain English)?
Apps Script is JavaScript with a set of built-in shortcuts for talking to Google products. Instead of wiring up API keys and authentication like you would in most languages, you call objects like SpreadsheetApp, MailApp, and DriveApp directly, and Google handles the connection for you.
If you've used a formula in a spreadsheet, you've already done a tiny version of automation. Apps Script is the next step up: instead of one cell calculating one value, you can read an entire sheet, make decisions about the data, send emails, create calendar events, or update other files — all from a few lines of code that you can run on a schedule.
> The whole thing runs on Google's servers, not your computer. Your automation keeps working even when your laptop is closed.
#What You'll Build
Here's the finished project so you know where we're headed: a task tracker with a script that checks which tasks aren't done yet and emails you a tidy summary. Before you write any code, set up a simple sheet. Open a new Google Sheet, rename the tab at the bottom to Tasks, and add three columns — Task, Due Date, and Status — with a few rows of sample data. Mark at least one row as Done so you can see the filtering work.
#Step 1: Open the Apps Script Editor
With your sheet open, click Extensions in the top menu, then Apps Script. A new tab opens with the code editor. You'll see a file called Code.gs and a starter function. Delete that starter function — you're about to write your own. (.gs stands for Google Script. This is where all your code lives.)
#Step 2: Write Your First Function
A function is a named block of code you can run. Let's write the simplest possible one to confirm everything is wired up. Replace whatever's in the editor with this:
function sayHello() {
  Logger.log("Hello from Apps Script!");
}
Logger.log() writes a message to a log you can read inside the editor. It's the Apps Script equivalent of "print," and it's the single most useful tool you have for checking what your code is doing. Save the project with Ctrl + S (or Cmd + S on Mac). Give it a name like "Task Reminder" when prompted.
#Step 3: Run It and Grant Permissions
At the top of the editor there's a toolbar with a Run button and a dropdown showing the function name. Make sure sayHello is selected, then click Run. The first time you run anything, Google asks for permission — your script wants to act on your behalf, so Google makes you approve it. Click Review permissions, choose your account, and on the "Google hasn't verified this app" screen click Advanced, then Go to your project name, then Allow. You only have to do this once per project.
> After it runs, open the Execution log at the bottom of the editor. You should see: Hello from Apps Script! — you just ran code on Google's servers.
#Step 4: Read Data From Your Sheet
Now let's connect to the spreadsheet. Add this new function below your first one:
function readTasks() {
  const sheet = SpreadsheetApp.getActiveSpreadsheet().getSheetByName("Tasks");
  const data = sheet.getDataRange().getValues();
  Logger.log(data);
}
SpreadsheetApp.getActiveSpreadsheet() grabs the spreadsheet this script is attached to. .getSheetByName("Tasks") selects the specific tab — this is why naming the tab mattered. .getDataRange() selects every cell that has data in it, automatically. .getValues() pulls those cells into a 2D array — a list of rows, where each row is itself a list of cell values. Select readTasks in the dropdown, click Run, and check the log. You'll see your data printed as nested brackets, with the header row first.
#Step 5: Filter for the Tasks That Matter
We don't want every row — we want the ones that aren't done. Replace readTasks with this improved version:
function getPendingTasks() {
  const sheet = SpreadsheetApp.getActiveSpreadsheet().getSheetByName("Tasks");
  const data = sheet.getDataRange().getValues();

  // Remove the header row (the first row)
  const rows = data.slice(1);

  // Keep only rows where the Status column isn't "Done"
  const pending = rows.filter(function (row) {
    return row[2] !== "Done";
  });

  Logger.log("You have " + pending.length + " pending task(s).");
  Logger.log(pending);
}
data.slice(1) returns the array starting from the second row, throwing away the header. Arrays count from zero, so item 0 is the header and item 1 is your first real task. .filter() walks through every row and keeps only the ones where the test is true. row[2] is the third column (Status), because counting starts at zero: row[0] is Task, row[1] is Due Date, row[2] is Status. Run it and the log should report the number of unfinished tasks.
#Step 6: Turn It Into a Real Automation (Send the Email)
This is the payoff. We'll build the email body from the pending tasks and send it to yourself. Replace getPendingTasks with this final function:
function sendTaskReminder() {
  const sheet = SpreadsheetApp.getActiveSpreadsheet().getSheetByName("Tasks");
  const data = sheet.getDataRange().getValues();
  const rows = data.slice(1);

  const pending = rows.filter(function (row) {
    return row[2] !== "Done";
  });

  // Nothing to report? Stop early — don't send an empty email.
  if (pending.length === 0) {
    Logger.log("Nothing pending. No email sent.");
    return;
  }

  // Build a readable list, one task per line
  let body = "You have " + pending.length + " open task(s):\n\n";
  pending.forEach(function (row) {
    body += "• " + row[0] + "  (due " + row[1] + ")\n";
  });

  // Send the email to yourself
  const email = Session.getActiveUser().getEmail();
  MailApp.sendEmail(email, "Your daily task reminder", body);

  Logger.log("Reminder sent to " + email);
}
Session.getActiveUser().getEmail() returns your own email address, so you don't have to type it in. MailApp.sendEmail(recipient, subject, body) sends a plain-text email — three arguments: who, the subject line, and the message. The if (pending.length === 0) check with return is a small but important habit — it stops the function early so you never get a pointless "you have 0 tasks" email.
> Run sendTaskReminder and check your inbox. A reminder listing your open tasks should arrive within a few seconds. You've just built a complete automation.
#Step 7: Make It Run Automatically Every Morning
Right now you have to click Run yourself, which defeats the point. A trigger makes Google run the function for you on a schedule. The easy way is through the editor: click the clock icon (Triggers) in the left sidebar, then Add Trigger. Choose sendTaskReminder as the function, set the event source to Time-driven, pick Day timer, and select a time window like 8am–9am. Save it, and you'll get your reminder every morning without lifting a finger.
You can also create a trigger with code, which is handy once you're comfortable. Add and run this function once:
function createDailyTrigger() {
  ScriptApp.newTrigger("sendTaskReminder")
    .timeBased()
    .everyDays(1)
    .atHour(8)
    .create();
}
This tells Apps Script: run sendTaskReminder every day, sometime in the 8am hour. Run createDailyTrigger a single time to set it up — running it repeatedly would stack up duplicate triggers.
#Common Beginner Mistakes (and Quick Fixes)
"TypeError: Cannot read properties of null" usually means getSheetByName() couldn't find your tab — check that the tab is spelled exactly Tasks, names are case-sensitive. Counting from one instead of zero is another classic: row[1] is the second column, not the first. Always save before running — the editor runs the saved version of your code. And never re-run setup functions like createDailyTrigger, or you'll stack up duplicate triggers. When something breaks, sprinkle Logger.log() lines through your code to see the value of things at each step.
#Where to Go Next
You now know the core loop that powers every Apps Script project: open the editor, write a function, run it, and attach a trigger to automate it. Good next steps are learning the SpreadsheetApp methods you'll use constantly, connecting to external services with UrlFetchApp, and formatting richer emails with HTML. The single biggest leap in skill comes from building tiny scripts for problems you actually have — a weekly summary, a form-response notifier, an auto-archiver for old files. Each one teaches you one new method, and they compound fast.
Writing this kind of script by hand gets faster with practice, but you don't have to memorize every method. Google Apps Script Copilot writes this in one prompt — free to try: describe the automation in plain English and get clean, copy-paste-ready code without leaving your browser.